
Whether you are gardening, cooking, riding a motorcycle or just want to cover up on a bad hair day, doo rags are easy to make and fun to personalize to suit to your style. If you would rather just download the durag pattern click here.
You will need:
- Big enough paper
- A square ruler
- A pencil
- Matching thread
- Pins
- Scissors (be sure they are sharp enough to cut through two or more layers of fabric)
- Sewing machine
- Pencil or tailors chalk
- Iron
- Fabric at least 18" long by 44" wide. (The width is important if you desire a tie that is in one entire piece. If the fabric is less wide you may opt for a shorter tie or you may sew two or more pieces of fabric together to make construct a complete tie.)
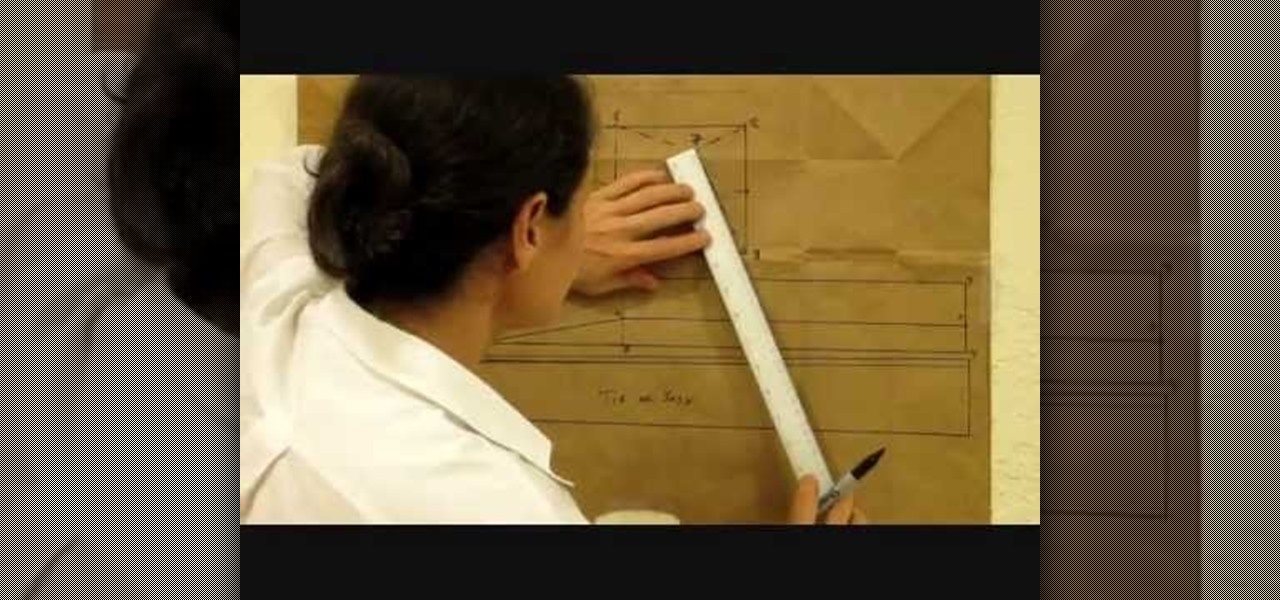
Step 1: Draw Three Rectangles
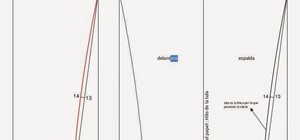
a. Side piece:Draw a perfect rectangle 9½ inches wide by 4¾ inches tall (24cm by 12cm).
b. Top piece:Draw the second perfect rectangle: 20 inches by 2½ inches or 51 cms x 6.5 cm.
c. Tie or sash: The third rectangle is not a perfect - it will be askew. One end should be 2½ (6.5 cm) inches tall but its parallel should be only 2 inches tall. 23 inches long (58.5 cm) add a ¼ inch seam allowance to this piece.
d. This piece is now finished. Write "Tie or Sash" on it. Also write the word "fold" on the longer side edge to remind you to place this edge on a fold when cutting out the fabric in order to have one long, symmetrical tie for your durag.
Step 2: Finish the Top Piece
The second rectangle you drew needs a few adjustments to complete pattern piece that will be used to cut the portion of the doo rag that covers the crown of your head:
a. Mark the top left corner as 1, the bottom left as 2, the top right as 3 and the bottom right as 4.
b. From point 4 measure up the side 1 inch (2.5 cm). Mark this spot as point number 5.
c From point 3 measure along the top line 12½ (31.5 cm). Mark that point number 6.
d. From point 4 measure along the bottom line 12½ (31.5 cm). Mark that point 7.
e. Connect points 6 and 7 with a dotted line.
f. From point 2 measure in 2¼ inches (5.5 cm) to the right. Mark that point 8.
g. From point 1 down measure ½ inch (1 cm). Mark this point number 9.
h. From point 6 measure 1½ inches (4 cm) down (along the dotted line you drew previously). Mark this point number 10.
i Connect point 5 to point 10, then 10 to 8, and then point 8 to point 9.
j. Write "Top" or "Crown" on this pattern piece. and the word "fold" at the top line to remind you to place that edge along a fold when cutting out on fabric in order to have a complete and symmetrical piece.
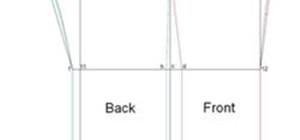
Step 3: Finish the Side Piece
Going back to the first rectangle you drew, make the following adjustments:
a. Mark the corners of the rectangle ( 1, 2, 3 and 4) starting from the upper left going clockwise.
b. Create a dotted "X" through the triangle by drawing a dotted line from point point 1 to point 3 and another one from point 2 to point 4.
c. Now draw a dotted "plus sign" by dotting a horizontal line and a vertical line right through the middle of the "X". Mark the top point of th "plus sign" point 5 and the bottom point 6.
d. Using the dotted line as a guide, measure down 2 inches (5 cm) from point 2. Mark that point number 7. Do the same on the other side from point 1 again using the dotted line as a guide. Mark the point number 8.
e. Draw a dotted lines from point 3 to point 7. Then from point 7 to 5 then 5 to 8 and finally from 8 to the point where the dotted guideline touches the left side of the rectangle (midpoint between point 1 and 4).
f. Find the midpoints of each of the dotted lines just describe in the previous step and mark them from right to left points number 9, 10, 11 and 12.
g. Round out the pattern piece. Measure out a perpendicular line from point 9 by ? inch (1 cm). From points 10, 11 and 12 measure out the same way but only ? inch (2 to 3 millimeters).
h. Now in freehand carefully draw in a curve from point 3 to point 7 using the outer dot of point 9 as a guide to the midpoint of this curve.
i. Draw in the rest of the outer curve the same way using the outer points of 10, 11 and 12 to guide you.
Step 4: Cut Out the Pattern Pieces
- Tie or Sash: Cut out the entire rectangle. Be careful to cut on the outer line not along the seam allowance line.
- The Top or Crown piece: Cut from point 5 cut along the line to point 10, then 10 to 8, then point 8 to point 9, 9 to 1 , 1 to 3 and finally back down the iine back to point 5.
- The Side piece: Cut along the freehand curve starting at point 3. Continue down the side of the rectangle to point 4 and then along the bottom line of the rectangle until you arrive back at point 3.
Step 5: Cut the Fabric and Sew Your Doo Rag
At the end of the accompanying video above (starting at minute 17:27) you can see a brief demonstration on how to place the pattern pieces on your fabric, cut and sew your doo rag together. For a more detailed version of the assembly and construction of your durag go to www.petitpoix.blogspot.com
Durag Assembly and Construction
- Place the pattern pieces onto the fabric and cut.
For the tie:
a. Take the top right and bottom right corners of the fabric and fold the fabric over to the left squarely in half.
b. (This step is optional if you would like a stronger double-faced tie.) Now take the two bottom corners of the fabric with your fingers and fold the fabric up squarely to a point just wide enough to accommodate the pattern piece.
c. Place the tie pattern onto the fabric along the bottom and along the right fold according to the instructions indicated on the pattern.
d. Cut out the fabric piece along the other top and left sides. If making a double-faced tie, the resulting fabric piece will be twice as wide and twice as long as the pattern piece.
For the middle head piece:
a. Unfold the remaining fabric and lay it onto the flat surface again.
b.Taking the two bottom corners of the fabric, fold the fabric up to a point just wide enough to accomodate the pattern piece. Since the piece you cut out prior to this one is not a perfect rectangle, be sure the left and right sides of the fabric are lined up.
c. Place the middle head pattern piece onto the fabric along the bottom fold as indicated on the pattern piece.
d. Cut out the fabric along the remaining lines of the pattern. You are cutting through two layers of fabric. The resulting fabric piece will be a symmetrical mirror image twice as wide as the pattern piece.
For the side head piece.
a. Unfold the remaining fabric and lay it onto the flat surface again.
b. Taking the two right corners, fold the fabric squarely in half.
C. To avoid wasting fabric, place the side head piece onto the fabric in the upper left area and cut completely around the pattern piece. You will be cutting through two layers of fabric. The result will be two side head fabric pieces in a mirror image of each other. Note: It is not absolutely necessary at this point to avoid wasting fabric but it is usually desirable since you may later decide to add embellishments.
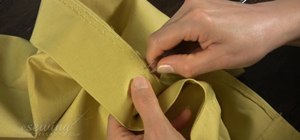
- Assemble and Sew the durag as follows:
a. Finish the raw edges of both side head pieces along the short straight side by folding over the edge twice, ironing flat and topstitching.
b. Now,take the side head pieces and place them in front of you on a flat surface with the decorative sides of the fabric face up. The short straight sides should on the outsides and the long straight sides on the nearest you.
c. Take the middle head piece and place it face down in between the side head pieces with the short flat edge nearest to you and the tail at the top.
d. place the short edge of the tail along the long bottom edge of the side head piece so that the corners line up at the bottom left.
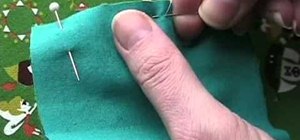
e. Maneuver the right edge of the tail piece and line it up with the arc of the side head piece, pinning it as you go, until you reach the end of the arc. The tail end will not be pinned. It will remain free.
f. Sew the pieces together using a ¼"(about 6 or 7 mm) seam allowance.
g. Line up the other side head piece on the opposite side of the tail piece in the same way but in a mirror image of what you just did.
h. Fold the tie in half lengthwise to find the center point. Line up the center point of the front of the cap with the center point of the tie, right sides together. Pin the tie on along the straight edge around the bottom of the cap.
i. Sew the tie on to the cap using a ¼"(about 6 or 7 mm) seam allowance.
j. You will now finish the raw edges by folding them over twice as thinly as possible, ironing them down and topstitching. If you have chosen to make a double-faced tie, you will now fold proceed to fold the tie completely in half lengthwise and topstitching it into place.
Just updated your iPhone? You'll find new emoji, enhanced security, podcast transcripts, Apple Cash virtual numbers, and other useful features. There are even new additions hidden within Safari. Find out what's new and changed on your iPhone with the iOS 17.4 update.


1 Comment
How would you size this pattern for a specific noggin ?
I have a "bucket head" - I have to look for hats in at least size 8
Share Your Thoughts